 Building a retaining wall or brick structure may not seem like the most complicated task, but there’s a lot more to it than just stacking a few bricks on top of each other.
There’s a number of things to consider even before you can start to lay:
Do you know the right mix of sand, lime, concrete and water?
Do you have the tools, time and experience to lay bricks?
How will you ensure they’re laid evenly and level?
How deep do the footings have to be?
To save yourself the time, hassle – and sore back – leave it to the experts. We’ve sourced some of the best brick layers around, who can help you with any building project you may have.
Get a FREE no obligation quote
If you’re brave enough to try it yourself
 For those new to bricklaying, it’s always best to start small and build up. We recommend you try your hand at a small sample wall before launching into anything bigger.
A four brick course (row), three bricks high will be enough to practise, and the bricks used can always be cleaned and re-used on your real project.
Once you’ve nailed your ‘practice’ wall, you can take your new found confidence into your real DIY project.
Before you start
- Have a ready supply of bricks near the work area.
- Mix the mortar
- Add a plasticiser to the mix
- Avoid making the mortar too wet as the weight of the bricks will push it out of the seams.
- Don’t mix more than you’ll use. It’s advised you only mix enough for an hours bricklaying to avoid the mix drying out.
- If the mix becomes too dry, it must be thrown out. Adding water won’t bring it back to life.
Safety tip
Using and/or mixing cement can irritate and burn your skin so it’s important to use gloves during the process. When it comes to cutting bricks, safety goggles must be worn to avoid injuries to your eyes.
Mixing Mortar
- Mixing mortar by hand requires a few things:
- A spot board
- A spade or shovel
- The mix, and
- Water
Place the correct ratio of sand, cement and aggregate (if needed) on the spot board – four sand and one cement (4:1) is the most common ratio used. Mix thoroughly.
Pile the mix up in the centre of the board, then using your spade, make a hole in the centre of the mix and add some water. Fold the sides of the mix into the water using your spade until properly mixed. Once your mix has reached your desired consistency and colour, you’re ready to go.
Tip: Add small amounts of water at a time to the mix to avoid making it too wet. You can always add more water but a wet mix is hard to fix.
Safety tip
Bags of sand, cement and aggregate are heavy so the correct lifting technique and posture should be used to avoid injury. Try to lift the weight with your legs rather than your back and remember to wear gloves as cement can irritate and burn your skin.
Additives for mortar
- Plasticiser: When added to mortar, plasticiser can reduce cracking and crazing, thus making the mortar more durable
- Colouring agent: Added to mortar and cement to create a specific colour
- Waterproofer: Helps increase water resistance in your mortar and render
- Concrete hardener and dustproofer: When applied to the concrete surface after it has set properly, it hardens the surface of the concrete, reducing dust etc.
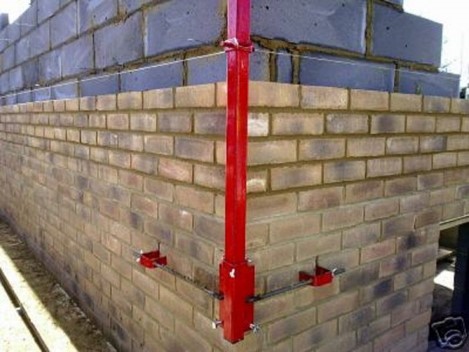
Lay one brick at each end of the course with a string line stretched between them along the top edge. This gives you a guide as you lay each course of bricks. See fig 1.
How to lay bricks
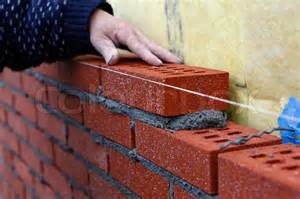
One rule to remember when laying bricks is that you should always lay them so the vertical joints are staggered. This will give your brickwork added strength and support.
Start off by laying one one brick at each end of the course you’re working on and stretch a string line along the top edge between them to give you a guide.
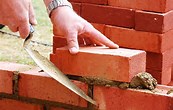
Once you’ve added the mortar to the foundation for the next course, use your trowel to make a V shaped trough, making it much easier to tap the bricks into position. For the vertical joint, spread some mortar onto the end of each of the bricks.
Make sure you use your spirit level to check the level of the first course of bricks. If the first course is out, the whole lot will be.
Cutting bricks to size
When cutting bricks to size, start by marking the cut on the brick (allowing for the mortar seam). After placing the brick on solid ground, align the cutting edge of your chisel with the mark and give it a solid hit with your hammer. Any rough edges can be chipped off using your hammer and chisel afterwards.
Finishing off
Before the mortar sets on each course of bricks, it’s important that you strike/point the seams.
By filling in any holes in the seams and striking/pointing them, you’ll end up with a professional finish to your brickwork.
Using a soft brush, brush the brickwork down to remove any excess mortar from the face of your brickwork.
Colouring agents
For a better finished look to your brickwork, you can always add a colouring agent to the mortar mix.
Colouring agents are simple to add but it’s important that you make sure you take note of the quantities of sand, cement and agent going into each mix and different quantities can produce variations in the shade of colour.
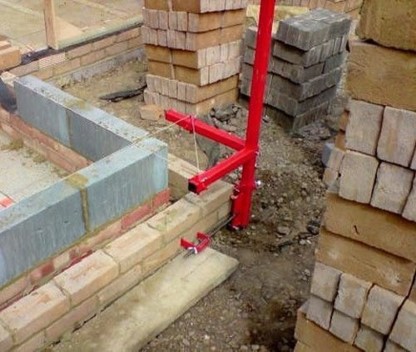
Tip: For added peace of mind, pick up a bricklaying profile kit from the hardware store.